


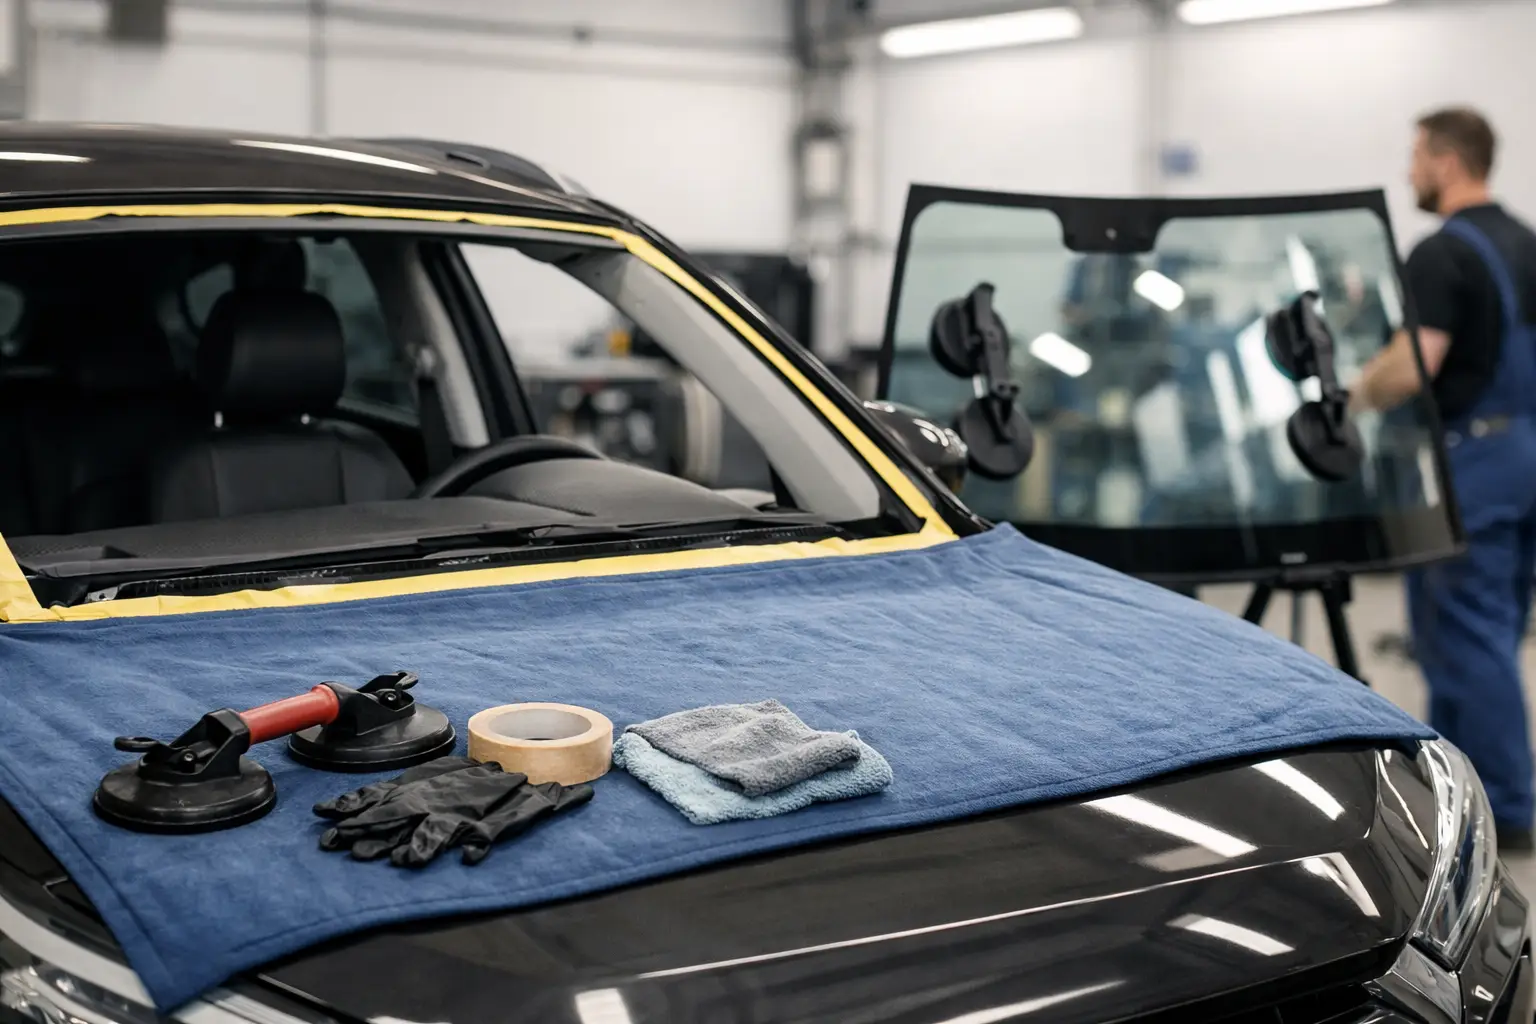
Prepare Car for Windscreen Replacement Properly
A windscreen replacement can look like a straightforward glass job, but the quality of the result depends on far more than the new screen itself. When you prepare car for windscreen replacement properly, you give the technician clear access, reduce avoidable delays and help protect the interior, bodywork and electronic features around the glass.
For Singapore drivers, this matters especially after a leak, stone impact or heat-related crack. A windscreen is not simply a viewing panel. It contributes to the vehicle’s structural integrity, supports camera and sensor systems on many modern cars, and forms part of the weather seal that keeps heavy rain outside where it belongs.
How to Prepare Car for Windscreen Replacement
The most useful preparation starts the day before your appointment. Remove personal items from the dashboard, front footwells and front seats. This includes parking cards, ornaments, phone mounts, cash-card holders, tissues and loose accessories. Technicians need room to work safely around the A-pillars, dashboard and windscreen aperture, and fewer loose items mean less chance of misplacement or damage.
If your vehicle has a dashboard camera, ask in advance whether it needs to be removed or disconnected. Some cameras are mounted directly to the glass, while others are attached near the headlining or powered through concealed wiring. A specialist should assess the mounting arrangement before work begins rather than pulling at clips, trim or cables during removal.
It is also sensible to clear the boot if the new windscreen or associated parts need to be kept temporarily inside the vehicle. This is not always necessary, but it gives the workshop flexibility and prevents a rushed handover if further inspection is required.
Leave the vehicle reasonably clean
Your car does not need a full detailing session before replacement. However, a reasonably clean exterior helps the technician identify mouldings, trim condition and existing paint damage around the windscreen. A clutter-free interior also makes it easier to protect upholstery and dashboard surfaces from old adhesive residue, dust and glass fragments.
Avoid applying fresh wax, ceramic coating or oily dashboard dressing immediately before the appointment. Products near the glass edge can complicate cleaning and inspection. If there is heavy dirt, tree sap or stubborn residue around the windscreen frame, mention it when booking so the work scope can be planned accurately.
Tell the Specialist What Happened
A clear description of the damage helps determine whether replacement is the right route and whether related components need attention. A crack that began after a stone strike is different from a screen that has been leaking for months, and both are different again from glass damage after body repairs or an attempted DIY sealant fix.
When arranging the work, explain whether you have noticed water entering the cabin, wind noise at speed, misting around the edges, loose exterior mouldings or corrosion near the windscreen frame. These signs may point to issues beyond the glass itself. Replacing a windscreen without addressing a compromised frame, damaged trim or poor previous bonding can leave the underlying problem unresolved.
For older, premium or restoration-worthy vehicles, the condition beneath the old glass deserves particular attention. Hidden corrosion can affect the bonding surface and must be treated correctly before a new screen is fitted. This is where disciplined in-house workmanship matters: the job should be assessed as a complete installation, not treated as a quick glass swap.
Check Cameras, Sensors and Accessories
Modern windscreens often carry more equipment than owners realise. Forward-facing cameras may support lane functions, traffic-sign recognition or emergency braking systems. Rain and light sensors, heated screen elements, antennas and heads-up display areas can also affect the replacement specification.
Before the appointment, photograph the windscreen from inside and outside, particularly around the rear-view mirror area. Take note of any warning lights currently displayed on the instrument panel. This creates a useful record of the vehicle’s pre-existing condition and helps avoid confusion over faults that were present before the work.
Do not assume that any visually similar windscreen is suitable. The correct glass must match the vehicle’s features, tint band, acoustic layer, camera bracket and sensor requirements. In some cases, camera calibration may be required after fitting. The exact requirement depends on the make, model and system fitted, so it should be confirmed before the vehicle is released.
Plan for the Adhesive Curing Time
A properly bonded windscreen needs time to cure. The safe drive-away time depends on the adhesive system, ambient conditions and vehicle design. Singapore’s heat and humidity can influence working conditions, but they do not remove the need to follow the adhesive manufacturer’s specified curing period.
Arrange alternative transport if possible, especially if your appointment is during a working day. Do not book an urgent long drive immediately afterwards, and avoid slamming doors while the adhesive is curing. The pressure change inside the cabin can disturb a fresh bond before it has reached its required strength.
Your specialist should provide clear instructions on when the vehicle can be driven, washed or exposed to high-pressure water. Follow them exactly. A car wash, heavy jet spray or improvised seal check too soon can create problems that have nothing to do with the quality of the fitted glass.
Before Handing Over the Keys
A short handover conversation prevents many avoidable misunderstandings. Share any concerns about previous repairs, water leaks, wind noise or electrical accessories. Confirm how the vehicle will be accessed and whether the alarm, keyless entry or immobiliser has any quirks the workshop should know about.
It is helpful to complete these checks before leaving the car:
- Photograph existing chips, scratches or trim damage around the bonnet, roof edge and A-pillars.
- Remove valuables, including coins, access cards, sunglasses and portable electronic devices.
- Check that wipers are functioning and tell the technician if the blades or arms are already damaged.
- Note warning lights and photograph the dashboard if any are active.
- Confirm whether insurance approval, excess payment or documentation has been arranged where applicable.
These are not signs of distrust. They are part of a proper, transparent process. Good workshop practice starts with an accurate assessment of the vehicle and a shared understanding of the work to be completed.
What Not to Do Before Replacement
Do not cover a growing crack with tape, glue or household sealant unless you have been specifically advised to do so for short-term safety. These materials can leave residue, hide the true extent of the damage and make clean removal more difficult. Likewise, avoid pressing on the damaged area or repeatedly opening and closing the doors with force if the crack has reached the edge of the glass.
Do not remove exterior mouldings or interior trim yourself to save time. Modern clips, retainers and pillar trims can be fragile, and some vehicles have airbags or wiring routed behind them. A small broken clip can turn a simple preparation task into an unnecessary trim replacement.
If the windscreen is severely shattered, keep the vehicle sheltered where possible and do not drive it unless it is safe and legally permitted to do so. Glass damage can impair visibility and compromise the vehicle in an accident. In that situation, speak to a specialist about the safest next step rather than taking risks on the road.
A Better Result Starts Before the Glass Comes Out
The best windscreen replacement is quiet at speed, dry in heavy rain, correctly aligned and properly integrated with the vehicle’s trim and technology. That standard comes from the right glass, careful removal, clean preparation of the bonding surface and a fitting process that respects the vehicle as a whole.
At 8 Cushion, windscreen-related work is approached with the same care given to roof linings, upholstery and restoration details: assess the condition properly, explain the scope clearly and carry out core work in-house. Preparing your vehicle well allows that process to begin without distraction, so the attention stays where it should be – on a precise, dependable fit.
Related posts
Rear Windscreen Demister Repair: What Matters
Rear windscreen demister repair: practical advice on failed heater lines, durabl
When Should a Windscreen Be Replaced?
Learn when should a windscreen be replaced, how to spot unsafe damage, and why e
Headliner Repair Versus Replacement Options
Compare headliner repair versus replacement options, from local sagging to full