


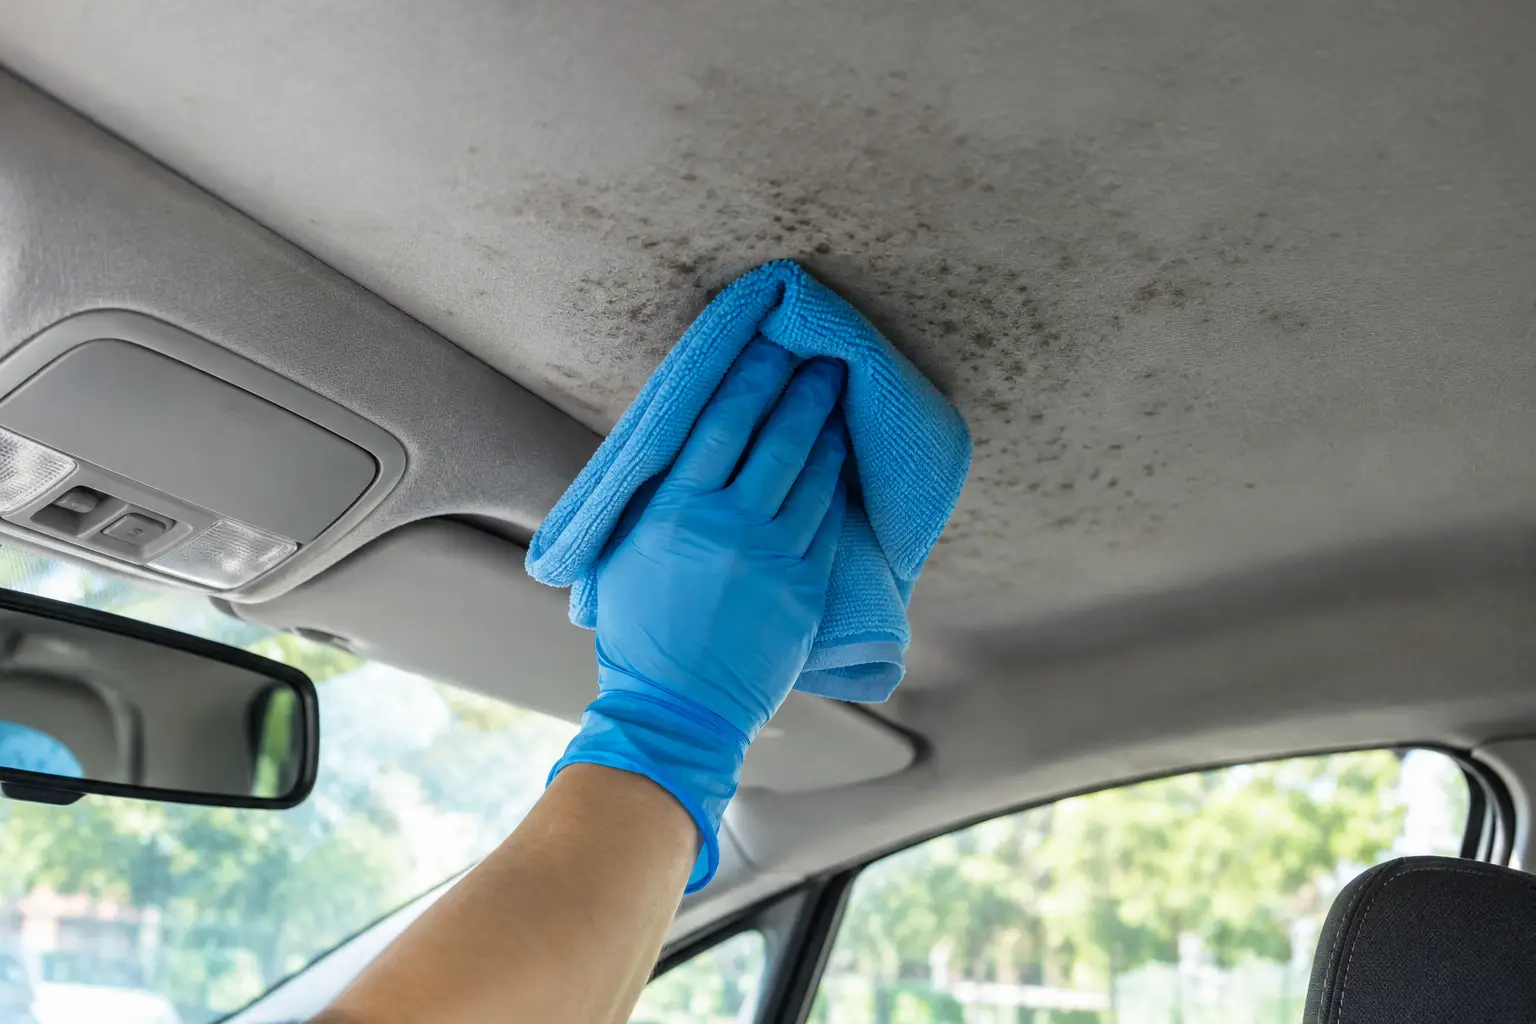
Remove Mould From Car Headliner Without Damage
A few dark specks above the driver’s seat can turn into a stubborn roof-lining problem quickly, particularly in Singapore’s humid climate. The safest way to remove mould from car headliner fabric is not to soak it or attack it with harsh household chemicals. A headliner is a layered component: surface fabric, thin foam backing and adhesive fixed to the roof panel. Too much moisture can leave you with a clean patch of fabric but a sagging lining soon after.
Mould also tells you something about the vehicle’s condition. Before cleaning, identify why moisture has been sitting inside the cabin. Otherwise, the marks and odour may return.
Why mould grows on a car headliner
Mould needs moisture, limited airflow and an organic surface to establish itself. Car headliners are particularly vulnerable after water enters through a leaking windscreen seal, sunroof drain, door seal, antenna base or convertible roof. A car left closed for extended periods after a wet journey can also develop mould, especially if wet floor mats, towels or luggage remain inside.
Condensation is another common cause. Parking in a damp environment, using the vehicle infrequently, or running the air-conditioning with a blocked drain can keep cabin humidity high. In convertibles, inspect the soft top, drainage channels and storage area carefully. Water does not always appear where the actual leak begins.
If the affected area is small, dry and limited to the visible fabric, careful cleaning may be appropriate. If there is a widespread musty smell, staining across several areas, soft foam behind the fabric, or obvious water marks, cleaning the surface alone is unlikely to be a lasting repair.
Inspect before you remove mould from car headliner
Park in a well-ventilated area and open all doors before disturbing the mould. Wear disposable gloves and a well-fitting mask, particularly if you have allergies, asthma or respiratory sensitivity. Avoid brushing or rubbing the area dry inside a closed vehicle, as this can release spores into the cabin.
First, check whether the lining is already loose. Press very gently around the affected area. If the fabric feels soft, detached or rippled, the foam backing or adhesive may have deteriorated. Cleaning can worsen that failure because even a small amount of liquid travels through the fabric and reaches the adhesive layer.
Also inspect the roof, pillars, windscreen edge, sunroof surround and carpets for dampness. A clean-looking headliner is of little value if a windscreen leak or blocked drain continues to feed moisture into the car.
What to prepare
Use clean, colourfast microfibre cloths, a soft detailing brush, a vacuum with a suitable upholstery attachment, disposable gloves and a small bowl of clean water. For the cleaning solution, choose a mild upholstery cleaner designed for automotive fabric, or use a light solution of water with a small amount of pH-neutral fabric cleaner.
The key is controlled application. Apply cleaner to the cloth, never directly onto the headliner. The cloth should be barely damp rather than wet enough to drip.
Avoid bleach, strong degreasers, concentrated disinfectants and heavy-duty household mould sprays. They can lighten fabric, damage dyes, leave a harsh residue and weaken the adhesive beneath the lining. Steam cleaning is also risky. Heat and moisture may cause an ageing headliner to drop away from the roof panel.
A careful cleaning method
Begin by gently vacuuming the area with minimal contact. Hold the upholstery attachment close to the fabric rather than pressing it firmly against the roof. This removes loose debris while reducing the chance of grinding spores deeper into the material.
Next, test your chosen cleaner on an inconspicuous edge of the headliner. Check for colour transfer, water rings or changes to the texture after it dries. This small step matters on light-coloured, Alcantara-style, brushed or older fabrics, where marks can be difficult to blend out.
Dampen a folded microfibre cloth with the cleaning solution. Work in small sections using light dabbing motions, starting at the outside edge of the affected patch and moving inward. Do not scrub. Scrubbing can roughen the fabric pile, spread the stain and pull on weakened foam.
Use a second dry microfibre cloth immediately afterwards to blot away moisture. Repeat only as needed. Several light passes are safer than one aggressive attempt. If mould marks remain but the fabric is becoming noticeably damp, stop and allow the lining to dry fully before deciding whether another pass is sensible.
Keep the doors open and use gentle airflow to dry the cabin. A fan positioned outside the vehicle can help. Do not aim high heat directly at the headliner, and do not close the car until the fabric is fully dry.
Treat the cause, not only the stain
Once the lining is dry, deal with the source of dampness. Remove wet items from the cabin, dry the carpets and check that air-conditioning drains are functioning. If a windscreen, sunroof or convertible-top leak is suspected, have it assessed before the next heavy rain.
For a vehicle stored for long periods, regular ventilation makes a practical difference. Use the car periodically, run the air-conditioning, and avoid sealing moisture inside after washing or travelling in wet weather. A moisture absorber may help during storage, but it cannot compensate for an active leak.
Persistent odour deserves proper attention. The headliner may look clean while mould remains in the foam backing, roof insulation, carpets or ventilation system. Masking the smell with fragrance is not a repair and can make it harder to judge whether the issue has returned.
When cleaning is the wrong solution
There is a point where restoration or replacement is more responsible than repeated cleaning. Consider professional assessment when mould covers a large section of the roof lining, has returned after cleaning, or is accompanied by sagging fabric. The same applies if the car has had flood exposure, prolonged water ingress or strong cabin odours.
A specialist can remove the headliner board, assess the backing foam and inspect the roof area that is normally hidden. If the lining requires replacement, the board can be prepared properly and retrimmed with suitable automotive material rather than simply gluing fabric over a failing surface. This is particularly worthwhile for premium, classic and restoration-worthy vehicles, where fit, material choice and clean edge finishing affect both appearance and long-term value.
At 8 Cushion, this type of work is assessed as a complete interior condition issue, not merely a surface-cleaning job. The objective is to establish whether careful cleaning will preserve the original lining or whether repair work will offer the more dependable result.
Prevention after the repair
A clean, dry headliner should stay that way when the cabin is kept dry. Check drainage points and rubber seals as part of routine care, particularly before periods of heavy rain. After an interior clean, a wet journey or a roof-top wash, allow the vehicle to air out before leaving it closed for days.
For convertible owners, keep roof seals and drainage areas free from leaves and debris, and do not store the roof while it is wet. For all vehicles, investigate unexplained condensation on the inside of the glass. It is often an early warning sign that moisture is being trapped in the cabin.
A headliner is easy to overlook because it sits above eye level, but it is one of the first interior surfaces to show the effects of water ingress. Deal with a small mould patch patiently, keep moisture away from the adhesive, and take recurring signs as a reason to find the leak before it becomes a larger restoration job.
Related posts
How to Protect Classic Car Interior Properly
Learn how to protect classic car interior trim, leather, vinyl and roof lining w
How to Assess Windscreen Chip Damage
Learn how to assess windscreen chip damage properly, spot repairable chips early
Mercedes Bolster Restoration: Repair or Replace?
Mercedes bolster restoration protects comfort, appearance and value. Learn when