


How to Repair Cracked Dashboard Trim Properly
A dashboard crack has a way of making an otherwise well-kept cabin look tired. It catches the light, collects dust and can spread with every hot afternoon. Knowing how to repair cracked dashboard trim starts with identifying what has actually failed: a surface coating, a flexible vinyl skin, a rigid plastic panel, or the dashboard structure beneath it.
A neat repair is not simply about filling a line and applying colour. The material must be stable, the repair compound must remain compatible with it, and the final texture and sheen must sit naturally beside the original trim. Get one of these stages wrong and the crack may reappear, the finish may peel, or the repaired area may look more obvious than the damage itself.
Assess the damage before choosing a repair
“Dashboard trim” covers several very different materials. Many vehicles use a foam-backed vinyl dashboard pad. Others have moulded ABS or polypropylene trim pieces, piano-black panels, soft-touch coatings, leather-covered sections or painted inserts. A repair method that works on one can permanently damage another.
Start by looking at the crack closely in clean, dry light. A fine split in a soft vinyl surface may be repairable without removing the dashboard. A rigid plastic vent surround with a clean break can often be bonded and reinforced from behind. However, broad cracks running across the main dashboard, deep splits in brittle plastic, or lifting foam beneath the skin usually need a more involved restoration or replacement assessment.
Press gently around the damaged area. If the material flexes, feels soft underneath or has separated from its backing, a simple surface filler will not hold for long. If the trim is heavily faded, chalky or sticky, the coating itself may be failing. In that case, repairing only the visible crack will leave an uneven result.
Check for safety-critical areas
Do not attempt a cosmetic repair over an airbag cover, an airbag deployment seam, steering-wheel trim, instrument cluster housing that affects visibility, or a component that secures controls. Adhesives, fillers and coatings can interfere with designed break lines or moving parts.
Equally, do not force a dashboard panel free if it contains sensors, wiring, climate-control components or fragile clips. Modern interiors are tightly packaged. A small crack can become a larger electrical or fitment issue if removal is rushed.
Tools and materials for cracked dashboard trim repair
The correct materials depend on the trim type, but preparation is consistent. You need a mild interior cleaner, lint-free cloths, a suitable degreaser, fine abrasive paper or pads, a plastic spreader, masking materials and a vacuum. For flexible vinyl, use a purpose-made flexible repair compound and colour coating system. For rigid plastic, use a compatible plastic adhesive or plastic welding method, plus reinforcement material where access allows.
Avoid household silicone sealant, general-purpose builders’ filler, superglue on visible surfaces and thick layers of hard epoxy on flexible trim. These products may look acceptable for a short period, but most cannot move with cabin temperature changes. Some also contaminate the surface, making a proper future repair more difficult.
Colour matching deserves equal attention. Dashboard finishes are rarely plain black. They can be charcoal, blue-black, warm grey or brown, and their sheen ranges from almost matt to lightly satin. A colour that appears correct under workshop lighting can look wrong in daylight. Where possible, test the finish on an inconspicuous area first.
How to repair cracked dashboard trim step by step
The following approach is suitable for minor cracks in stable, non-safety-critical vinyl or plastic trim. It is not a substitute for professional assessment where the dashboard is distorted, structurally split or near an airbag area.
1. Clean away contamination properly
Vacuum the crack and surrounding grain first. Then clean the area using an interior-safe cleaner, followed by the appropriate degreaser. Dashboard surfaces accumulate dressings, sun-protection products, skin oils and airborne residue. If these remain, filler and coating will not bond reliably.
Use minimal moisture around switches, vents and electrical controls. Allow the area to dry fully before continuing. A repair compound applied over trapped moisture can lift or bubble later.
2. Stabilise the crack rather than hiding it
For a rigid plastic crack, align the edges carefully. If the rear of the piece is accessible, bond or weld from behind first and add a reinforcement patch where appropriate. The front surface should be supported before any cosmetic work begins.
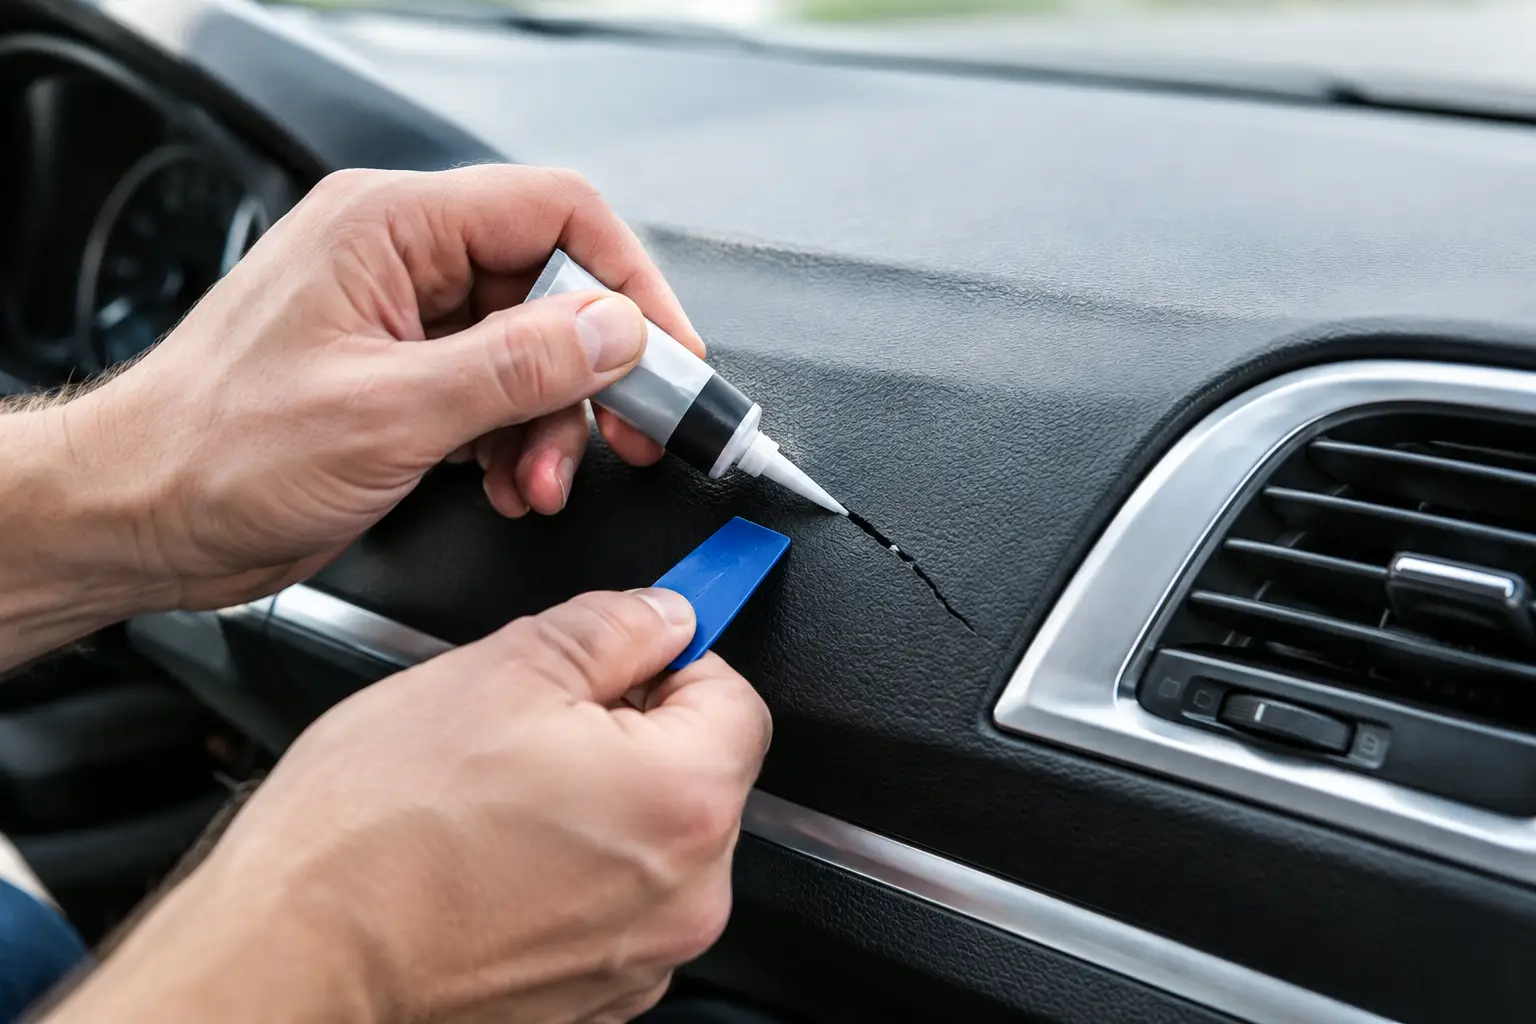
For a vinyl dashboard skin, gently open a tight split only enough to remove loose material and create a sound edge for the repair compound. Do not cut a large V-shaped channel unless the product system specifically requires it. Removing too much original material makes it harder to reproduce the profile and grain.
If the crack has curled edges, mild controlled heat may help relax the material, but this is a stage that demands restraint. Excess heat can shrink vinyl, warp plastic, damage foam backing or leave a glossy patch that cannot be blended out.
3. Build the repair in thin layers
Apply flexible filler to vinyl or an appropriate finishing material to rigid plastic in several thin applications. Push the compound into the split, then level it with a plastic spreader. Let each layer cure as directed before sanding or adding more material.
Trying to fill a deep crack in one heavy layer is a common cause of shrinkage, sinkage and visible repair lines. Thin layers give better control and reduce the chance of a hard ridge forming around the damaged section.
Once cured, level the repair gently with fine abrasive paper. The goal is to make the surface flush, not to flatten the surrounding dashboard texture. Keep the work local and use light pressure.
4. Recreate the original texture
A smooth patch on a grained dashboard is immediately noticeable, even when the colour is close. Professional repair systems use grain pads, texture papers or moulding techniques to replicate the surrounding finish while the repair remains workable.
For a small, lightly textured area, carefully pressing a suitable grain pattern into the repair can produce a convincing result. Match the direction and depth of the existing texture. Heavy pebble grain, stitched-look vinyl and soft-touch coatings are much harder to reproduce consistently, particularly across a wide repair.
This is often the point at which an inexpensive do-it-yourself repair reveals itself. Texture is what makes the repair disappear from normal viewing distance.
5. Apply colour in controlled coats
Mask the surrounding trim, glass and controls carefully. Use a coating formulated for automotive interior vinyl or plastic, not ordinary spray paint. Apply light, even coats and allow proper flash-off time between them.
Do not chase full coverage in the first pass. Heavy coating can fill the grain, leave an artificial gloss and crack as the material moves. Build colour gradually, then compare the repaired area under daylight as well as interior lighting.
The final sheen matters as much as the shade. A dashboard that should be low-sheen can look poorly repaired if one section reflects sharply through the windscreen. If the colour is difficult to blend, refinishing the whole removable trim piece may deliver a more even result than spot coating alone.
When repair is the wrong answer
Repair is worthwhile when the damage is local, the base material is stable and the original part has good fit, texture and value. It can preserve a rare or discontinued dashboard component while avoiding the disruption of removing a large assembly.
Replacement may be better when there are multiple cracks, severe ultraviolet damage, foam deterioration, warping, failed mounting points or extensive coating breakdown. On some vehicles, a replacement panel can be more durable and cost-effective than repeated cosmetic work. On others, especially older, premium or restoration vehicles, an original part may be worth restoring because replacements are unavailable or do not match correctly.
A specialist workshop should explain this choice clearly before work begins. At 8 Cushion, the value of an in-house assessment is not simply convenience. It allows the condition of the trim, adjacent upholstery, windscreen area and dashboard fitment to be considered together, without passing responsibility between different providers.
Prevent fresh cracks after the repair
Heat and ultraviolet exposure are the main enemies of dashboard materials. Use a windscreen sunshade when the vehicle is parked outdoors, particularly during long periods of direct sun. Keep the cabin ventilated where practical and avoid aggressive cleaning chemicals or glossy silicone dressings that can dry out, discolour or contaminate surfaces over time.
Clean the dashboard with a gentle product and a soft cloth. More product is not better. A clean, low-sheen finish is easier to maintain and makes early signs of ageing easier to spot.
A repaired dashboard should look like part of the vehicle, not a patch added to it. Taking time to diagnose the material and choose the right level of repair protects the cabin’s appearance, comfort and long-term value.
Related posts

Roof Lining Repair Cost: What to Expect
Roof lining repair cost depends on material, damage and vehicle type. Learn what
OEM Versus Aftermarket Convertible Windows
OEM versus aftermarket convertible windows: assess fit, materials, seals and ins

Mercedes Bolster Restoration: Repair or Replace?
Mercedes bolster restoration protects comfort, appearance and value. Learn when