


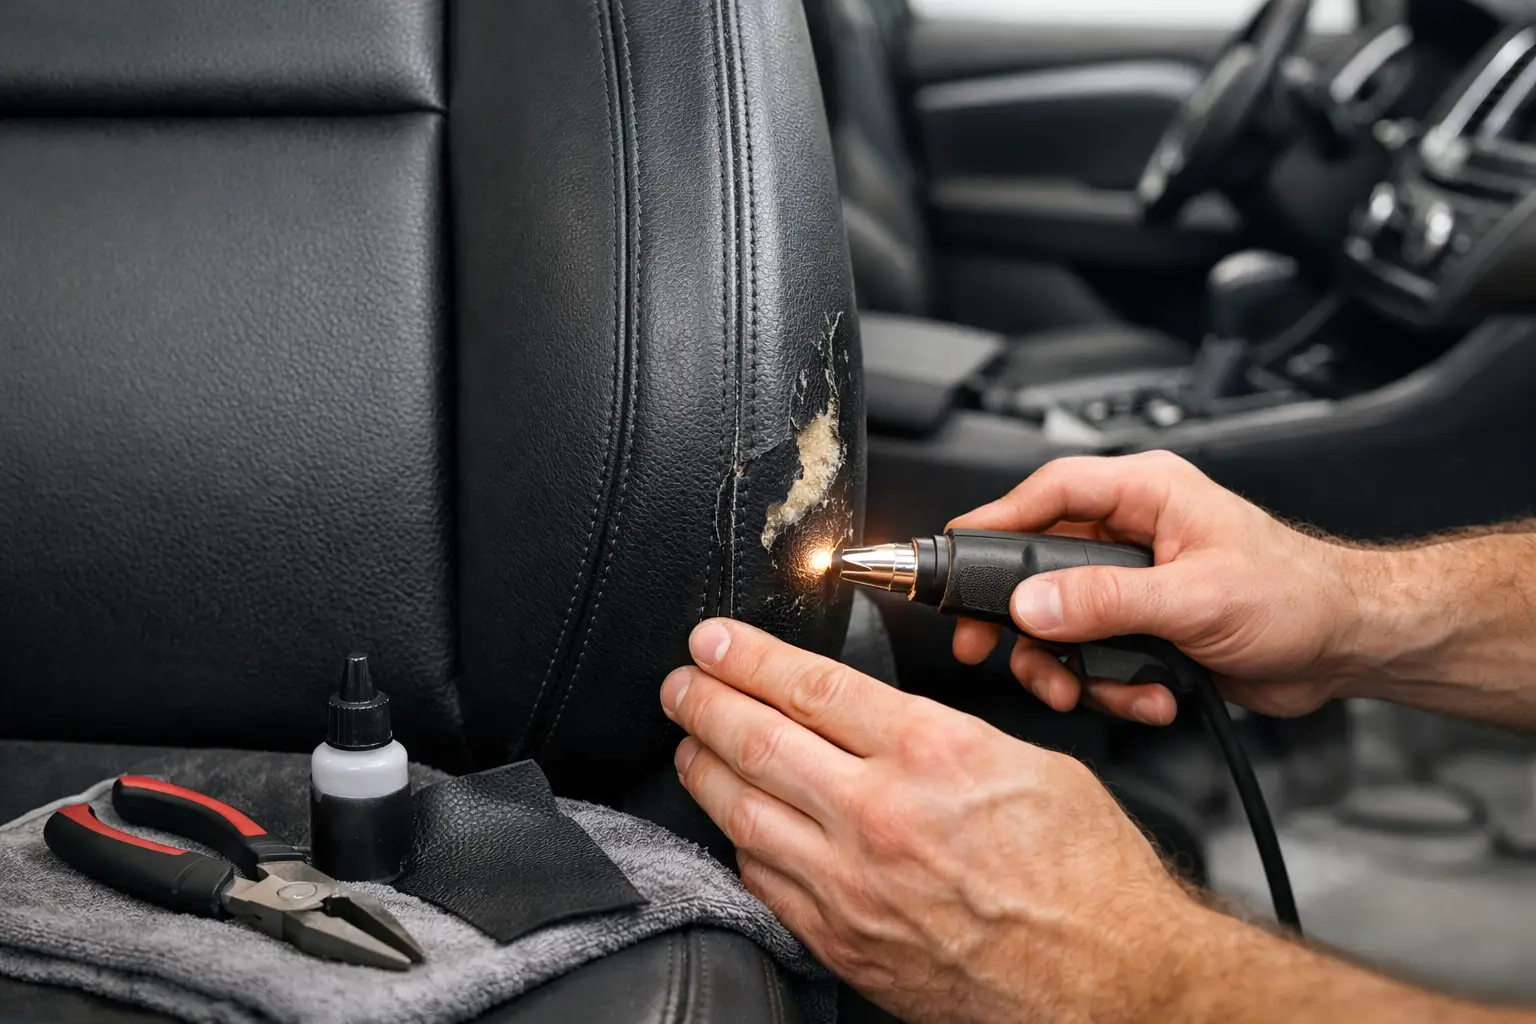
Best Seat Bolster Repair Methods That Last
A worn driver’s seat bolster is rarely just a cosmetic issue. That outer edge supports your weight every time you get in and out of the car, so it is usually the first part of the seat to crack, flatten, fade or split. The best seat bolster repair methods address the material on the surface and the structure underneath it. Treating only what is visible may make the seat look better briefly, but it will not restore the support and finish expected from quality upholstery work.
For owners of premium, older and restoration-worthy vehicles, the right repair preserves more than appearance. A correctly rebuilt bolster maintains driving comfort, protects the seat’s original shape and helps the cabin continue to match the standard of the rest of the vehicle.
Start with the cause, not the tear
Seat bolsters fail in different ways, and each calls for a different repair approach. Leather can dry out and crack from heat, friction and a lack of proper conditioning. Vinyl may become brittle, particularly around stitched edges. Fabric bolsters can wear thin, snag or separate at seams. Beneath all of these materials, the foam can compress, crumble or lose its profile.
The pattern of damage gives useful clues. A small surface scuff on firm foam may only need a local cosmetic repair. Deep creasing, a split that opens when pressure is applied, or a bolster that feels soft and collapsed points to a more involved job. If the seat has begun to sag towards the door, new upholstery alone will follow the old, flattened shape.
A proper inspection should also check stitching, seat frame condition, adjustment mechanisms and any side airbag seams. Modern seats are not simple cushions. Careless trimming or incorrect stitching in an airbag-equipped seat can create a safety concern, which is one reason this work deserves specialist handling.
The best seat bolster repair methods by material
There is no single repair method that suits every seat. The most durable result depends on the original trim material, the extent of the damage and whether matching material remains available.
Leather repair for light wear and colour loss
When leather is structurally sound but looks tired, a refinishing repair can be an effective option. The affected area is carefully cleaned to remove body oils, old dressing and surface contamination. Minor abrasion can then be levelled, followed by a colour-matched leather coating and an appropriate protective finish.
This is often suitable for light scuffs, dye transfer, shallow scratches and worn colour on an otherwise healthy bolster. It retains more of the original upholstery and is less invasive than replacing a panel.
Its limitation is clear: refinishing cannot turn severely stretched, cracked or torn leather back into strong hide. A heavily worn edge may look presentable after colouring, but the underlying leather can still fail under daily use. For a vehicle that is kept long term, a patch-up finish is not always the best value.
Replacing the damaged leather panel
Where leather has split, hardened or lost its grain, replacing the affected bolster panel is generally the stronger method. The seat cover is removed, the damaged section is unpicked and a new piece is cut to the correct grain direction, stretch and seam allowance. It is then stitched into the existing cover before refitting.
Panel replacement offers a more permanent repair because the failed material is removed rather than disguised. It also allows the workshop to assess the foam and support beneath the cover at the same time.
Colour matching is the key consideration. Even where the original leather specification is known, age and sunlight can alter the colour of the remaining trim. A skilled repair may involve selecting the closest suitable leather and refinishing surrounding areas where necessary to achieve a balanced result. A perfect result is more achievable on a full re-trim, but an experienced workshop can often make a replacement panel blend naturally without replacing the entire seat.
Vinyl repair and replacement
Vinyl is common in practical, classic and commercial vehicle interiors, as well as on seat side sections paired with leather or fabric inserts. Small splits can sometimes be repaired using flexible compounds and grain-matching techniques. This is useful where preserving original material is a priority and the damage is limited.
Once vinyl has become brittle, however, local filling is a short-term answer. The surrounding material may split beside the repair, especially on the outer bolster where entry and exit place constant stress on the edge. Replacing the affected section with quality automotive-grade vinyl is usually more dependable.
The replacement material must be selected for more than colour. Thickness, backing, sheen and grain all affect how it sits beside the original trim. Domestic upholstery vinyl is not designed for the movement, heat and abrasion experienced inside a car.
Fabric bolster repairs
Fabric seats commonly fail at seams and high-contact edges. If the cloth itself is intact, restitching a separated seam with suitable thread may be enough. A loose seam should not be ignored, as the fabric can fray quickly once the edges are exposed.
For holes, thinning fabric or damaged patterned sections, the best solution is usually to replace the panel rather than apply a visible patch. Sourcing a close match can be challenging on older vehicles, especially where the original cloth has been discontinued. In those cases, an owner may choose a complementary material for both front-seat bolsters, or re-trim all matching seat sections for a consistent appearance.
A repair should respect the vehicle’s character. The practical choice for a daily car may differ from the correct restoration decision for a collector vehicle where original pattern and specification matter.
Foam rebuilding is often the difference
The outer cover receives the attention, but compressed foam is one of the main reasons repaired bolsters lose their shape again. Over years of use, the foam breaks down at the entry point, leaving the driver sitting against an uneven or unsupportive edge. This can make a seat look wrinkled even after the leather has been repaired.
Professional foam rebuilding involves removing weak material, shaping high-density automotive foam and bonding it to restore the original contour. The aim is not simply to make the bolster larger. It must support the occupant comfortably, align with the opposite bolster and allow the cover to fit without excessive tension.
Too-soft foam collapses quickly. Foam that is too firm can create a hard ridge and strain the cover. The right density and shape depend on the seat design, whether it is a sport seat or a comfort seat, and the condition of the remaining cushion. This is craftsmanship measured in millimetres, not a generic foam insert cut to size.
When a full re-trim makes better sense
A local bolster repair is often sensible when the rest of the seat is in good condition. It becomes less convincing when multiple panels are cracked, the colour has faded unevenly, the stitching is failing throughout or previous repairs have left the cover distorted.
A full re-trim gives control over material consistency, stitching, piping and fit across the whole seat. It can also be the better route where matching a single original panel is impossible. The trade-off is cost and originality. Re-trimming in a new material may improve the cabin dramatically, but owners of heritage vehicles should consider whether maintaining original specification is part of the vehicle’s value.
Independent advice matters here. A responsible workshop should explain whether a targeted repair, partial replacement or full re-trim is justified by the seat’s actual condition, not simply recommend the largest job.
Avoid repairs that create bigger problems
DIY leather fillers, adhesive patches and universal seat covers can have a place as temporary measures, but they are rarely long-term bolster repairs. Adhesive patches tend to lift at curved edges. Heavy filler can crack as the leather flexes. Poorly matched paint can rub off onto clothing or leave the seat looking noticeably repaired.
Do not ignore a split because it is small. Once the foam is exposed, it absorbs moisture and dirt, then breaks down faster. A minor panel repair can become a complete cushion rebuild if left too long.
It is also wise to avoid harsh household cleaners and silicone-heavy dressings. They can strip protective finishes, make surfaces slippery and complicate later refinishing. Use products intended for automotive upholstery and follow the material manufacturer’s care guidance.
What quality workmanship should look like
The finished bolster should hold its original line, with no loose material, obvious wrinkles or uneven seams. Stitch spacing should be consistent, piping should sit smoothly, and the repaired area should not look overfilled or sunken. More importantly, the seat should feel right when you sit in it.
At 8 Cushion, seat upholstery work is assessed as a complete assembly: trim, foam, stitching and fit. Keeping specialist work in-house gives tighter control over material selection and finishing, with clear accountability from inspection through to refitting.
A well-repaired bolster should not draw attention to itself every time you open the door. Address the wear while it is still localised, choose a method suited to the material and structure, and your seat can retain the comfort and character that made the car worth keeping.
Related posts
Classic Car Trim Restoration Guide for Lasting Results
A classic car trim restoration guide covering inspection, materials, repair choi
Convertible Roof Fabric Review: What Matters
Convertible roof fabric review for Singapore owners: learn how material, fit, st
Can Cracked Leather Car Seats Be Repaired?
Can cracked leather car seats be repaired? Yes - but the right method depends on