


Windscreen Calibration Guide for Singapore Cars
A windscreen replacement is no longer just a glass job. On many modern cars, the area behind the rear-view mirror houses a forward-facing camera that supports safety systems such as lane departure warning, adaptive cruise control, autonomous emergency braking and traffic-sign recognition. This windscreen calibration guide explains what happens after the glass is replaced, why the process matters, and how to make sure your vehicle is returned with its safety features working as intended.
For owners of premium, ageing or restoration-worthy vehicles, the right question is not simply whether a replacement windscreen looks clear. It is whether the glass, camera mounting, installation process and calibration checks have all been handled correctly. That is where specialist workmanship and a disciplined process make a real difference.
What windscreen calibration actually means
Windscreen calibration is the process of aligning the vehicle’s camera or sensor system after a replacement, repair or disturbance to the windscreen area. The camera may appear to sit in the same place, but even a slight difference in its position, angle or view through the glass can affect how the car interprets road markings, vehicles and hazards ahead.
The system does not measure the road like a human driver. It relies on precise reference points, camera images and vehicle-specific software parameters. A camera that is marginally misaligned may not produce an obvious warning on the dashboard, yet it can recognise lane markings too early, too late or incorrectly. That is not a risk worth accepting merely to save time on a replacement job.
Calibration does not improve a damaged camera or correct unrelated electronic faults. It verifies that a functioning camera has been correctly referenced to the vehicle after work that may have affected its view or mounting position.
When is calibration required?
The vehicle manufacturer’s repair instructions should always be the starting point. Many cars require recalibration after the front windscreen is replaced, particularly where there is an Advanced Driver Assistance System, commonly called ADAS. Some vehicles also require it after removal and refitting of the camera, replacement of the rear-view mirror assembly, body repairs that affect alignment, or a windscreen impact close to the sensor area.
There are exceptions. A basic windscreen with no camera or forward-facing sensor may not need calibration at all. Equally, a small stone-chip repair well away from the camera may not trigger a calibration requirement. It depends on the car, the equipment fitted and the manufacturer’s prescribed repair method.
Do not rely on the presence or absence of a visible warning light alone. A proper assessment begins by identifying the vehicle specification and checking for camera equipment, heated glass elements, rain sensors, heads-up display compatibility and any other windscreen-mounted technology.
Signs that should prompt an inspection
After a windscreen replacement, take notice if lane-assist messages appear, safety functions become unavailable, the camera warning remains illuminated, or driver-assistance behaviour feels inconsistent. A distorted view around the camera area, a loose cover, wind noise or water ingress also deserves immediate attention. These may point to an installation issue rather than a calibration issue, but both should be checked before the vehicle is treated as complete.
Static and dynamic calibration: the practical difference
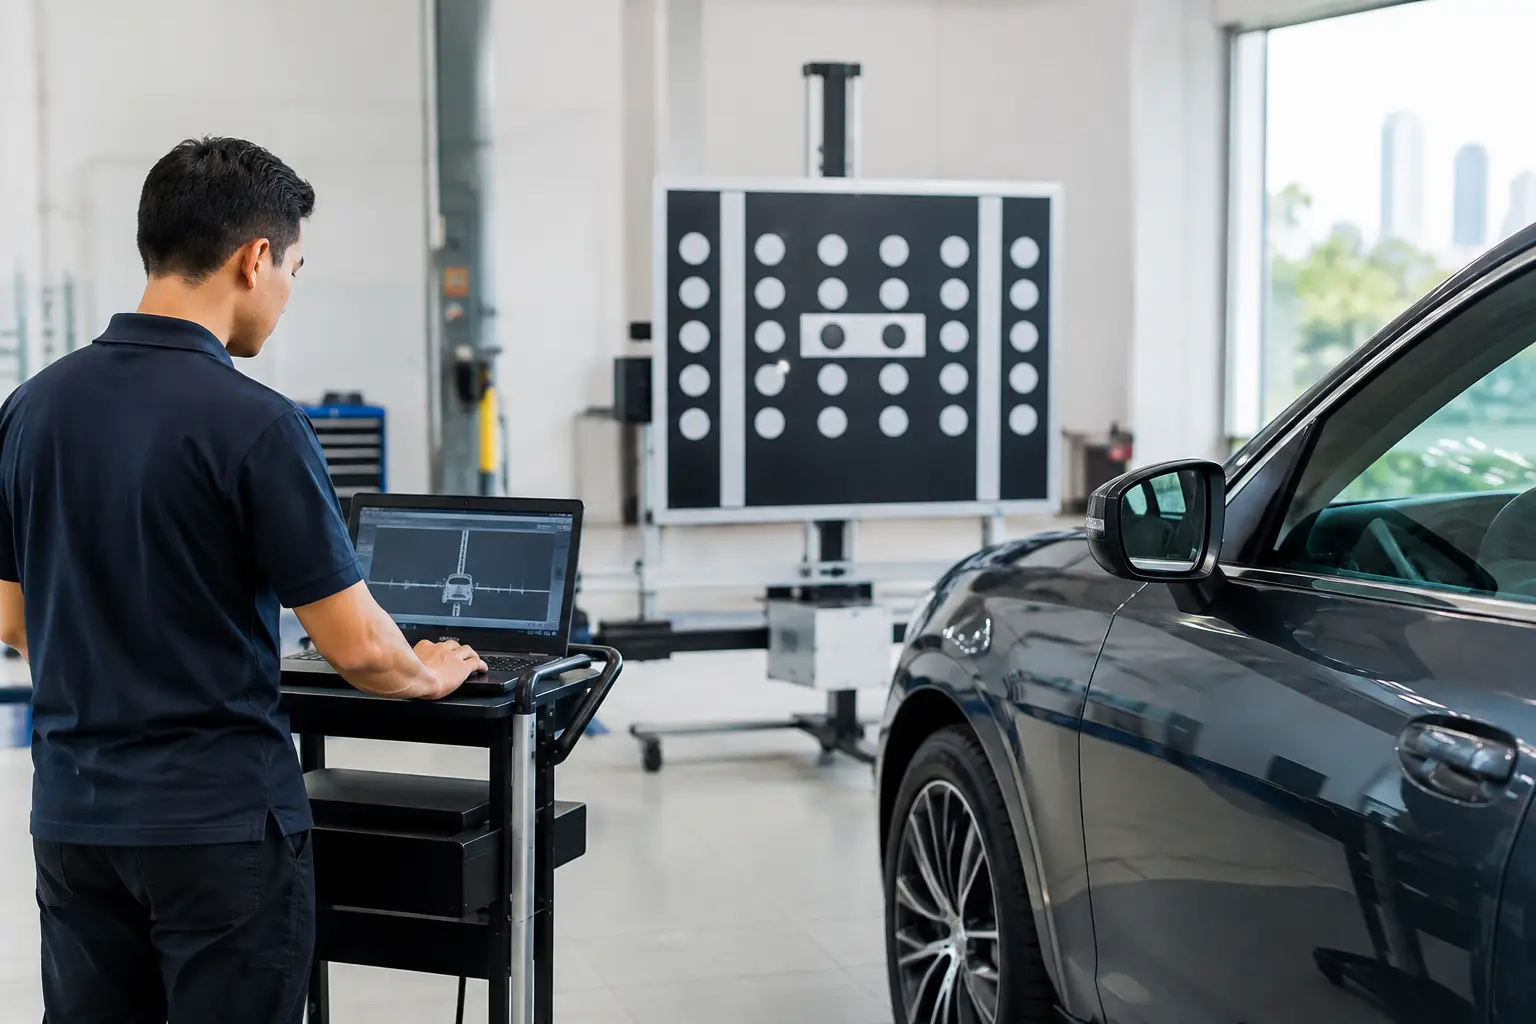
There are two common calibration methods. Static calibration is performed in a controlled workshop environment using diagnostic equipment and precisely positioned targets. The vehicle is set on suitable ground, its tyre pressures and ride height are considered where required, and the equipment follows the manufacturer’s measurements and procedure.
Dynamic calibration is completed while the car is driven under specified road conditions. Depending on the vehicle, the system may need clear lane markings, a particular speed range, good visibility and a route free from interruptions. The car uses real road references to complete its learning process.
Some vehicles require one method, while others require both. This is why a generic promise to “reset the camera” is not enough. A diagnostic reset, fault-code clear or short test drive is not automatically a completed calibration. The correct method must suit the vehicle.
The windscreen calibration guide before replacement
A careful process starts before the old glass is removed. The technician should confirm the exact windscreen specification, not just the model name and year. Vehicles within the same model range can have different camera brackets, acoustic layers, solar coatings, antenna connections, heating elements or heads-up display requirements.
The camera bracket is particularly significant. On some cars it is bonded to the windscreen itself. If the replacement glass does not have the correct bracket, optical qualities or approved fitment, the camera may not sit as designed. No amount of software adjustment should be used to disguise an incorrect physical installation.
The condition of the camera, its cover and surrounding trim should also be checked before work begins. Pre-existing faults, moisture marks, cracked housings or damaged connectors need to be recorded and discussed clearly. This protects the owner from uncertainty and gives the workshop an honest baseline for the job.
A properly managed replacement normally includes these practical controls:
- confirmation of the correct glass specification and sensor provisions;
- careful removal that avoids damage to paint, trim, dashboard surfaces and roof lining;
- correct bonding, curing time and refitting of mouldings, sensors and interior covers;
- diagnostic checks and calibration in line with the vehicle’s requirements; and
- a final quality inspection before handover.
The adhesive curing period matters. A vehicle should not be driven or released simply because the glass is physically in place. Adhesive systems have specified safe drive-away times that can vary with product, temperature and humidity. Singapore’s heat and rain are reasons to follow the product instructions closely, not reasons to rush them.
Why glass quality and fitting quality work together
A windscreen is part of the vehicle structure. It contributes to cabin sealing, visibility, occupant protection and, on many models, ADAS performance. Choosing solely on the lowest replacement price can create a false economy if it leads to poor optical clarity, missing features, incorrect sensor compatibility or weak fitment standards.
That does not mean every vehicle must use the same type of replacement glass. The appropriate choice depends on the manufacturer’s requirements, availability, the vehicle’s age and the owner’s priorities. What matters is transparent advice about the available specification, any differences from the original fitment and the consequences for technology such as cameras or heads-up displays.
The same principle applies to trim. Clips, mouldings and interior covers should be refitted cleanly and securely. A technically successful calibration is incomplete if the cabin has rattles, loose trim, damaged roof-lining edges or a sensor cover that has been forced back into place. Good work is visible in the finished details as well as the diagnostic report.
Questions worth asking before authorising the work
A specialist should be able to explain whether your vehicle needs calibration and why. Ask which windscreen specification will be fitted, whether it supports your car’s camera and sensor system, and whether calibration will be static, dynamic or both. It is also reasonable to ask how the completed work will be verified and whether any faults found during inspection will be reported before additional work proceeds.
For a valuable car, ask how the workshop protects the dashboard, A-pillars, roof lining and exterior paint during removal. These areas are easily marked when work is rushed or handed between parties. A clear scope of work, direct communication and accountable in-house handling provide greater peace of mind than vague assurances.
At 8 Cushion, the approach to specialist vehicle work is based on careful assessment, honest advice and workmanship that respects the condition of the car. Windscreen-related work should receive the same attention as upholstery, convertible tops and interior restoration: correct materials, proper preparation and no shortcuts hidden behind a quick handover.
After calibration: what the owner should check
Before leaving, make sure warning messages have been addressed and that the camera cover, mirror area and surrounding trim are properly fitted. Confirm whether there is any bedding-in or curing advice, and retain the job documentation. Over the next few drives, pay attention to unusual wind noise, water leaks, camera alerts or unavailable ADAS functions.
There is one sensible limit to owner testing. Do not attempt to prove that emergency braking or lane support works by creating a dangerous road situation. These systems are driving aids, not a substitute for alert driving, and their performance should be assessed through the correct workshop process.
A clear windscreen should give you more than a better view of the road. When the glass, sensors and calibration are treated as one complete job, it gives you confidence that the vehicle is ready to protect its occupants and perform as its manufacturer intended.
Related posts
Best Car Seats Repair Solutions for Lasting Comfort
Compare the best car seats repair solutions for worn leather, torn fabric and co

Car Windscreen Replacement Complete Guide
Car windscreen replacement complete guide for Singapore drivers - costs, timing,
Car Seat Bolster Repair That Lasts
Car seat bolster repair restores comfort, support and appearance. Learn when rep