


How to Restore Sagging Roof Lining Properly
A sagging roof lining can make an otherwise well-kept car feel neglected the moment you open the door. The fabric may hang above the rear seats, peel away around the sun visors, or droop enough to obstruct the rear-view mirror. Knowing how to restore sagging roof lining properly means looking beyond the loose fabric. A lasting repair depends on the condition of the backing board, the correct replacement material and careful refitting of every trim component.
For many vehicles in Singapore, heat and humidity accelerate the problem. The foam bonded to the underside of the original headlining fabric breaks down over time, turning into a fine powder that no adhesive can reliably bond to. Simply sticking the old fabric back up may look acceptable for a short while, but it rarely remains secure.
Why roof linings sag in the first place
Most modern roof linings are made from three layers: a fabric-facing surface, a thin foam layer and a moulded backing board. The board gives the lining its shape, while the foam provides a soft finish and holds the fabric against it.
As the foam ages, it degrades and releases from either the fabric, the board, or both. High cabin temperatures, prolonged sun exposure and moisture all contribute. The fabric itself may still appear clean and usable, which is why a quick glue repair can seem tempting. However, adhesive applied over degraded foam attaches to dust rather than a stable surface.
The problem is not always limited to the centre of the roof. Areas around the windscreen, rear screen, grab handles, interior lights and pillar trims can also begin to lift. On vehicles with a sunroof, the roof lining has additional openings and shaped edges that need precise handling. Convertible models require a different assessment again, as their interior headlining and soft-top components are designed as separate systems.
How to restore sagging roof lining for a lasting result
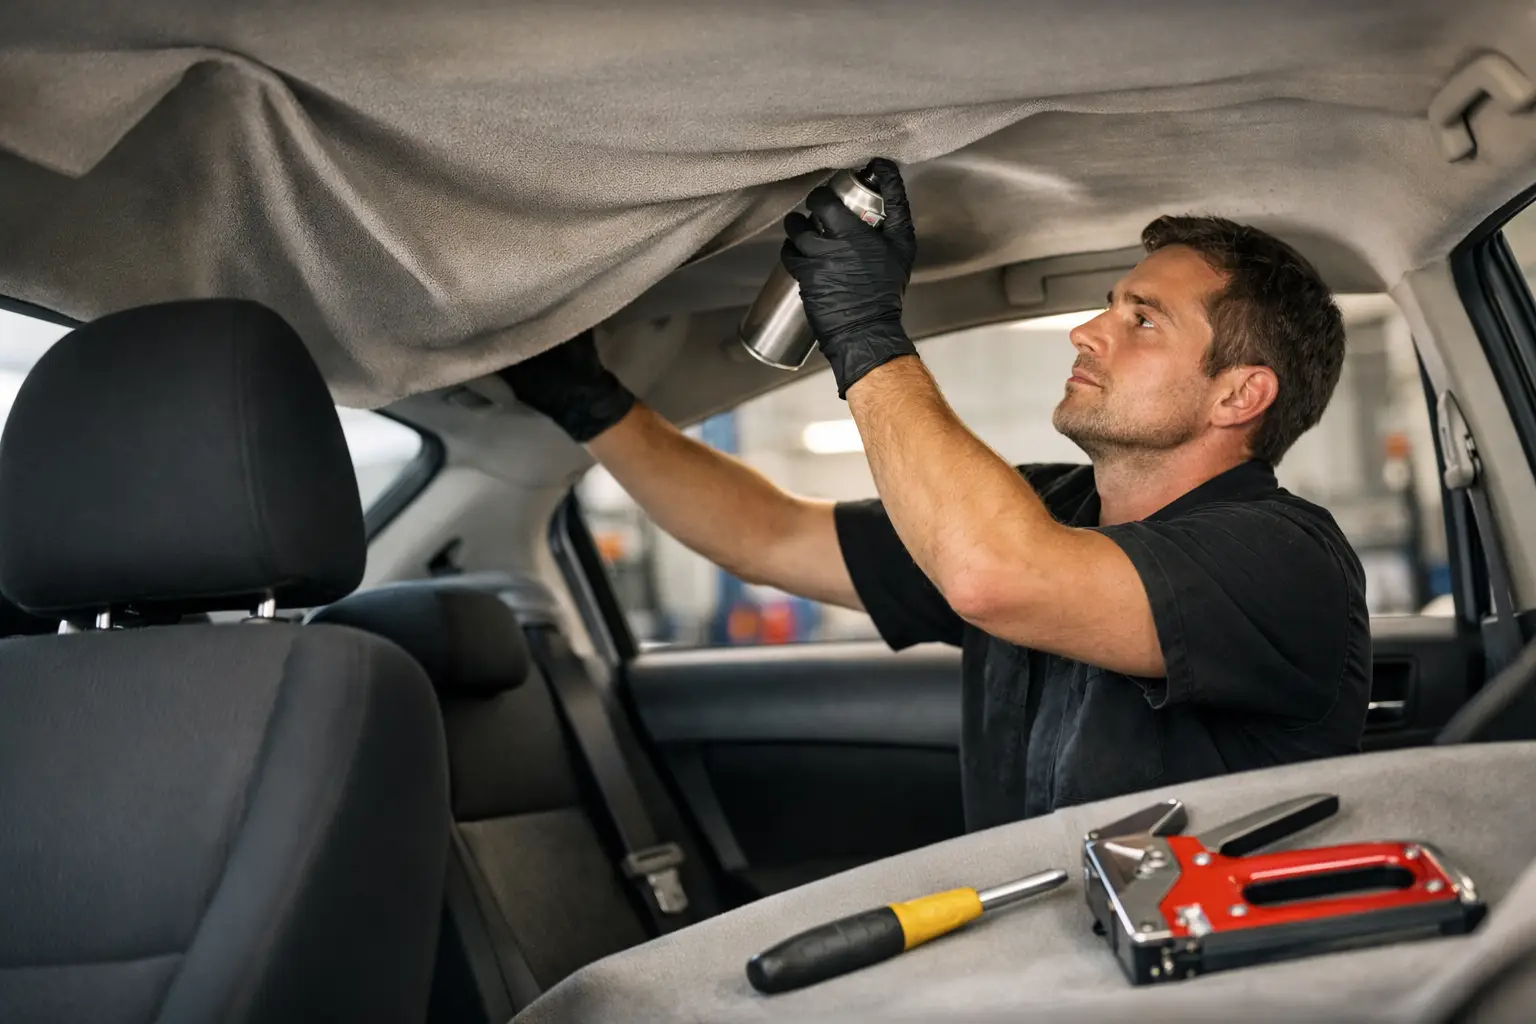
A proper restoration begins with removal, not glue. The roof lining board must be taken out of the vehicle without cracking, creasing or damaging surrounding trims. Depending on the model, this can involve removing sun visors, grab handles, pillar covers, lamps, seals and sections of the rear trim. In some cars, the front seats may need to be reclined or removed to create enough clearance for the board.
This is where the difference between a cosmetic patch and a proper roof-lining restoration becomes clear. The board is often fragile after years in the vehicle. Forcing it through a door opening can crack corners, distort contours or damage the fibreglass-based substrate. Once damaged, the board may need repair before it can be retrimmed.
Strip the failed foam completely
With the board removed, the old fabric and deteriorated foam are stripped away. Every trace of loose foam must be brushed, scraped or cleaned from the board. This stage is labour-intensive, but it is fundamental to adhesion.
The surface should be clean and sound before new material is applied. If there are cracks, weak edges or minor breaks around fittings, these should be repaired and reinforced at this stage. A lining board that is not structurally stable can cause fresh fabric to pull away or sit unevenly after installation.
Select material suited to the vehicle
Replacement headlining material should match the vehicle’s requirements, rather than merely its original colour. Thickness, stretch, foam density, backing type and heat resistance all affect the finished result.
A material with too little stretch may wrinkle around curves, recesses and sunroof openings. One with excessive foam or unsuitable backing can look bulky around trims and may not sit cleanly against the roof shape. Colour also deserves careful consideration. A close match helps preserve the cabin’s original character, particularly in premium, classic and restoration-worthy vehicles.
For some owners, a like-for-like finish is the right choice. Others may prefer a refreshed colour or a more durable material where the original specification is no longer practical. There is no single answer – the best choice depends on the vehicle, the condition of its interior and whether originality or a tailored finish matters most.
Apply adhesive with control, not excess
Specialist trim adhesive is applied to both the prepared board and the backing of the replacement material, following the product’s required open time. Too little adhesive risks future lifting. Too much can soak through fine fabric, create hard patches or leave visible marks on the finished surface.
The material is laid gradually from a controlled starting point and worked over the board’s contours. It should be pressed into recesses without stretching it so aggressively that it later pulls back. Openings for lights, visors and handles are cut only once the fabric is fully bonded and stable.
This controlled process matters particularly around curved edges and deep moulded sections. A roof lining may appear flat when viewed from the front seats, yet poor fitting often reveals itself later as ripples, loose corners or misaligned openings.
Refit the board and trims carefully
The restored board must return to the vehicle without bending it or catching the new material on trim edges. All fittings should sit correctly, and trim clips should be inspected for damage rather than forced back into place. Broken or weak clips can lead to rattles, loose pillar trims and an unfinished appearance.
Before the final handover, the lining should be checked around each opening, along the windscreen and rear screen edges, and at the door apertures. Sun visors should fold and locate properly, interior lights should sit flush, and no material should interfere with airbags or safety-related trim. A clean roof lining is not only about appearance. Correct reassembly protects the comfort, function and safety of the cabin.
Can you repair a sagging roof lining yourself?
A small corner that has only just started to lift may be temporarily secured, provided the foam underneath is still intact. This is uncommon on an older lining, but it can buy time in the right circumstances. Use a suitable trim adhesive sparingly and avoid household glues, which can stain fabric, turn brittle in heat or leave an uneven finish.
For widespread sagging, DIY repairs carry more risk. Spray adhesive through a partially lowered fabric usually fails because the degraded foam remains in place. Pins, staples and tacks may hold the lining briefly, but they can damage the board and create an untidy cabin. Double-sided tape is similarly short-lived in a hot vehicle.
Removing the entire board is possible for an experienced owner with the right space and patience. Yet it is worth weighing the cost of a mistake against the saving. Damaged pillar trims, broken clips, bent boards and incorrect material selection can make a straightforward retrim more expensive to correct. Vehicles with panoramic roofs, complex interior lighting, side-curtain airbags or fragile aged trims are generally better handled by a specialist workshop.
Signs that a replacement board may be needed
Not every sagging roof lining can be restored using the original board. The board may need more extensive repair or replacement if it has split across a broad section, warped due to water ingress, softened around fittings, or lost key mounting points.
Water marks deserve particular attention. A stained lining can be the visible symptom of a leaking sunroof drain, windscreen seal, roof aerial base or convertible-top seal. Retimming the roof without identifying the source of moisture risks damaging the new material. The leak should be investigated and resolved before the lining is refitted.
A specialist assessment can also identify whether the issue is truly the headlining. On some cars, loose door seals, deteriorated pillar fabric or damaged sunroof shade panels can resemble a sagging roof lining from the driver’s seat. Treating the right component avoids unnecessary work and keeps the repair scope transparent.
What to expect from a professional restoration
A professional roof-lining restoration should include a clear inspection of the board, trims and surrounding areas before work begins. The work scope should explain whether the original board can be retained, what material will be used and whether any clips, trim repairs or leak-related issues need attention.
At 8 Cushion, roof-lining work is handled in-house, allowing the removal, board preparation, retrimming and refitting process to remain under one workshop’s control. This matters because roof lining is not a job that benefits from handovers between separate parties. Accountability for material choice, workmanship and final fit should remain clear from the beginning.
The cheapest quotation is not always the most economical option if it relies on a surface glue repair, generic fabric or rushed refitting. A properly prepared lining should sit taut and natural, preserve access to all cabin features and remain stable through regular use in Singapore’s climate.
If your roof lining has started to droop, avoid pulling at it or applying random adhesives while it is still hanging. Arrange an inspection while the board and trims are intact. Early, careful attention gives you the best chance of restoring the cabin cleanly and keeping it that way.
Related posts
How to Maintain Convertible Soft Top Properly
Learn how to maintain convertible soft top fabric, seals and rear windows proper
Vinyl Versus Canvas Convertible Tops
Vinyl versus canvas convertible tops - compare durability, noise, care, appearan
7 Signs of Windscreen Seal Failure
Spot the signs of windscreen seal failure early. Learn what leaks, noise, rust a